- Flashing esp-link
- Connect to wireless network
- Check/change serial settings
- Connect to Home Assistant
- Connect to dsmr-reader
- Connect to Domoticz
The choice for using esp-link can be the need to read the data raw, instead of processed via ESPHome. When using another system than Home Assistant, like dsmr-reader, Domoticz, p1monitor or any other logging system, the best option is to read the data raw from the Smart Meter. Sometimes it’s easier to use esp-link on Home Assistant too. At the time of writing, the gas values in DSMR 2 and 3 differs from DSMR 4 and 5. Therefore not good readable within ESPHome. Using esp-link and reading the data direct from the Smart Meter fixes that.
How to get esp-link?
First of all, you need a serial driver to connect the SlimmeLezer+ to your computer. The SlimmeLezer+ uses a CH340 chip, that can be downloaded here.
if you’re using my previous SlimmeLezer, the chance might be that you need another driver. About 90% is using the CH340 chip, yet some Wemos’s come with a CP210x chip. That driver can be downloaded here.
- Make sure you’ve the right driver installed (see text above)
- Connect the SlimmeLezer to the computer via a proper USB cable (one which does power and data! Some cables are for charging only and don’t pass through data).
- Open this page via Chrome or Edge browser and click on below button (the one you want to install).
That’s about it, in a nutshell…
How to connect it to your wireless network?
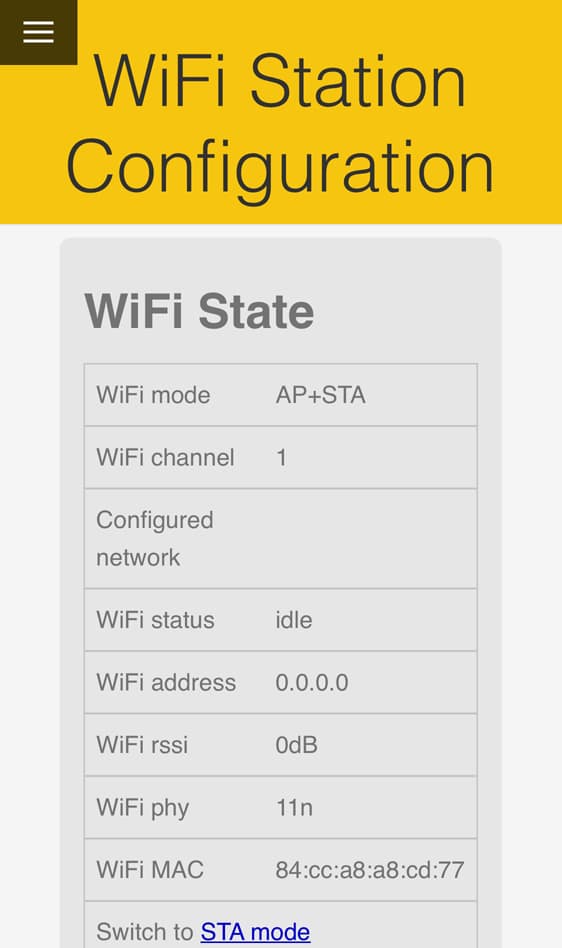
After flashing esp-link on the SlimmeLezer, it will broadcast an unsecured wireless network: ESP_xxxxxx (last 6 characters of its mac-address). The screenshots below shows as mac-address 84:cc:a8:a8:cd:77. In this case, the wireless network name will be ESP_A8CD77 (84:cc:a8:a8:cd:77)
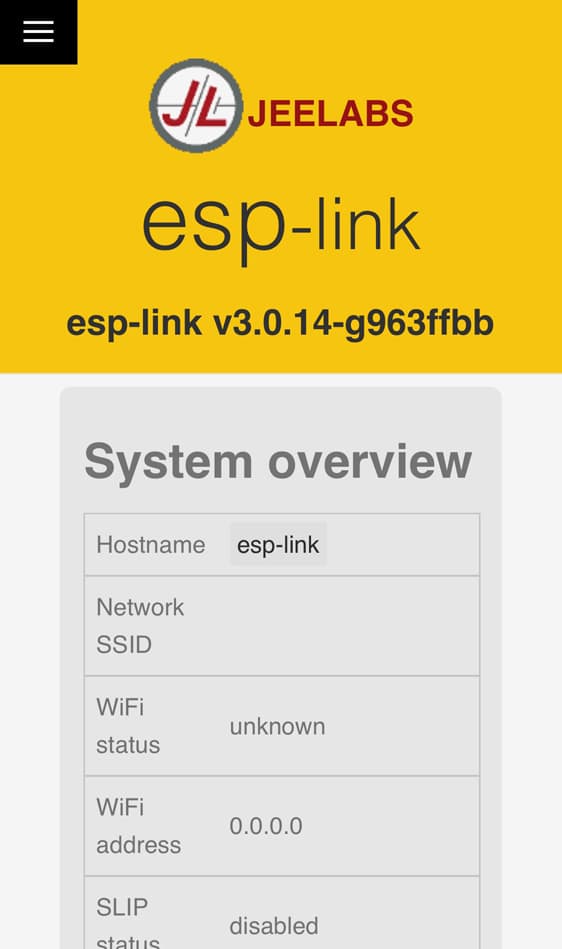
Connect to that wireless network and when connected, browse to http://192.168.4.1 (Unfortunately this doesn’t go automatically, you need to do this manually). There you should see the GUI from esp-link:
Click in the left top corner on the ‘hamburger’-menu and select ‘WiFi Station’:
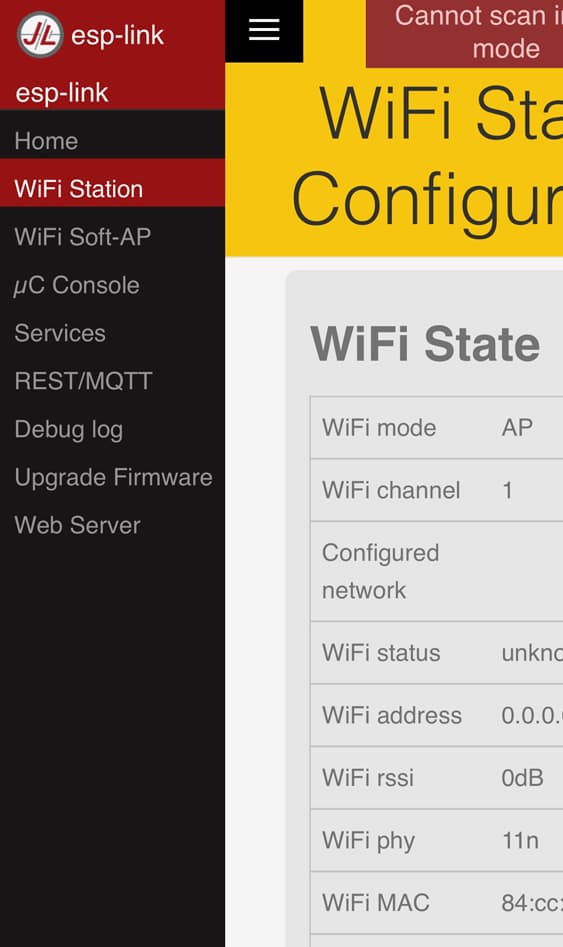
There it shows it is in AP-mode. Scroll a little bit down and click on ‘STA+AP mode‘:
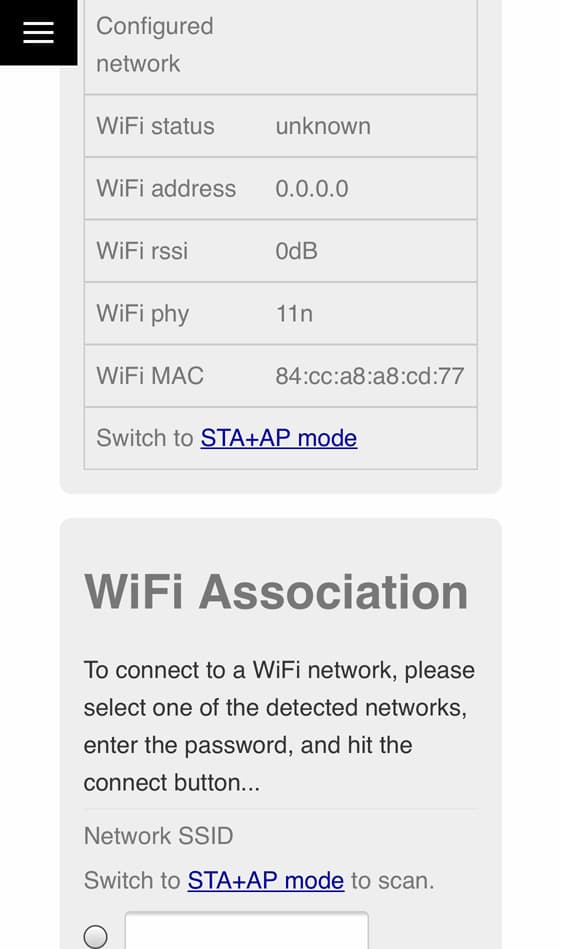
Now the ESP is in AP+STA mode and will scan for wireless networks:
Scroll down till you reach the wireless network settings. There should be some wireless networks (at least one: yours 😉). Select your network and fill in the password (if needed):
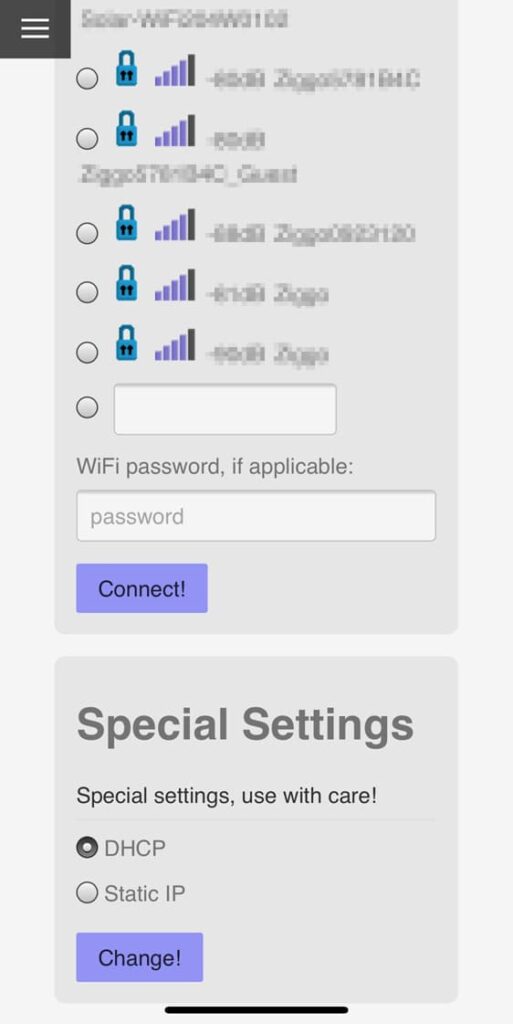
Click on connect and you’re done! On the top it will show a green notification that it’s trying to connect, and when connected, it’ll show briefly the ip-address it received.
Please visit their website for more information and/or details: https://github.com/jeelabs/esp-link
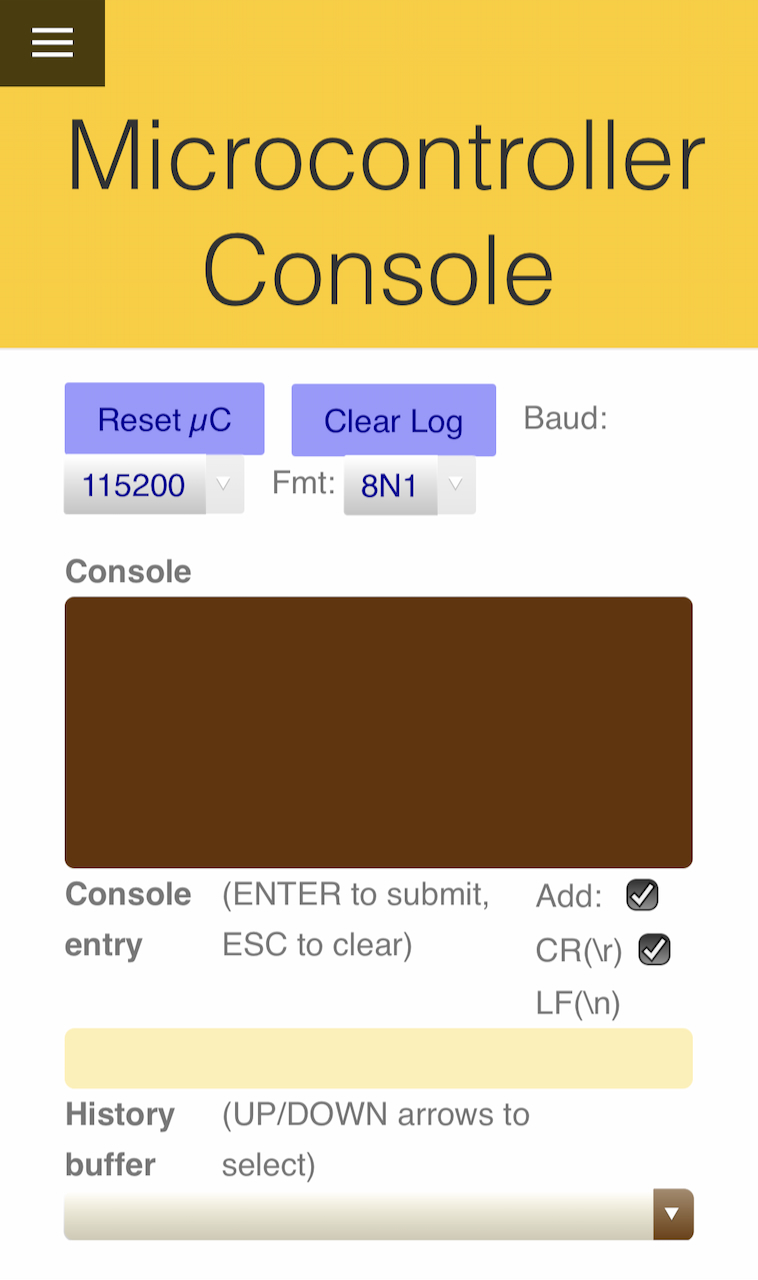
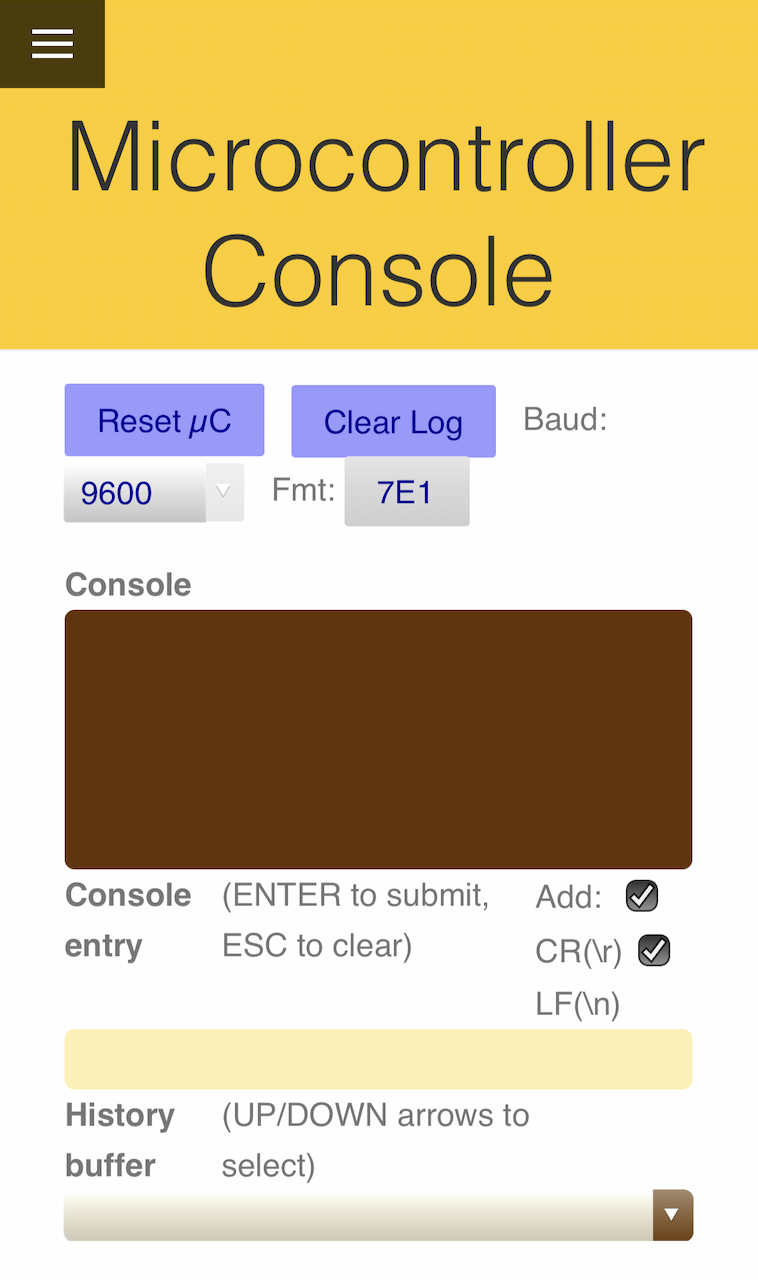
Check the serial settings (only for DSMR 2 and 3)
By default, the serial settings is set to 115200 baud and 8N1, which is the setting used for DSMR 4 and 5.
If you’re using DSMR 2 or 3, the serial setting is 9600 baud in 7E1 format. To adjust this, click on the hamburger menu and go to µC Console, there you’ll see the settings like the photo below on the left. Change it to the settings like shown in the right photo (for DSMR 2 or 3):
Connect to Home Assistant
To connect it to Home Assistant, you need to use the integration DSMR Slimme Meter. Go to Configuration > Devices & Services and click bottom right on + ADD INTEGRATION.

- Search for DSMR Slimme Meter
- Select Network
- Fill in ip-address of the reader, port 23 and the right DSMR version
- Click op submit


Your device is now connected to Home Assistant.
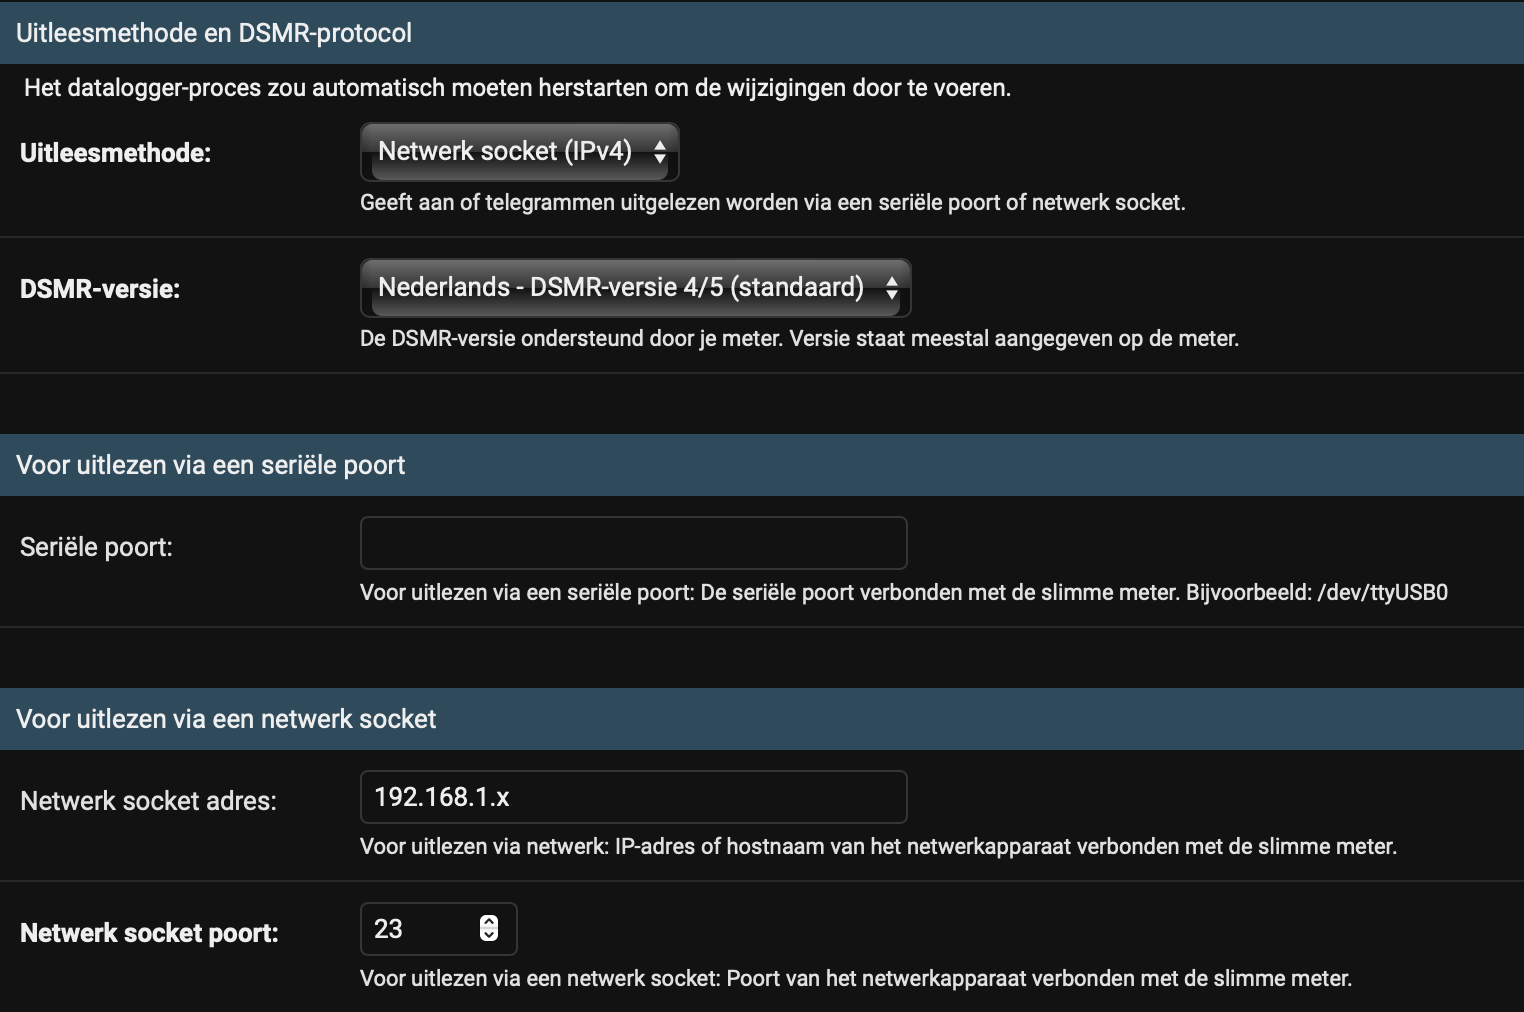
Connect to dsmr-reader
After installing dsmr-reader (which I absolut love 😍) you have to setup the connection to the Smart Meter. Go to Configuration and under Datalogger there is the section Datalogger configuration.
Choose for method Network Socket, choose the right DSMR version, fill in the ip-address of the reader and port 23:
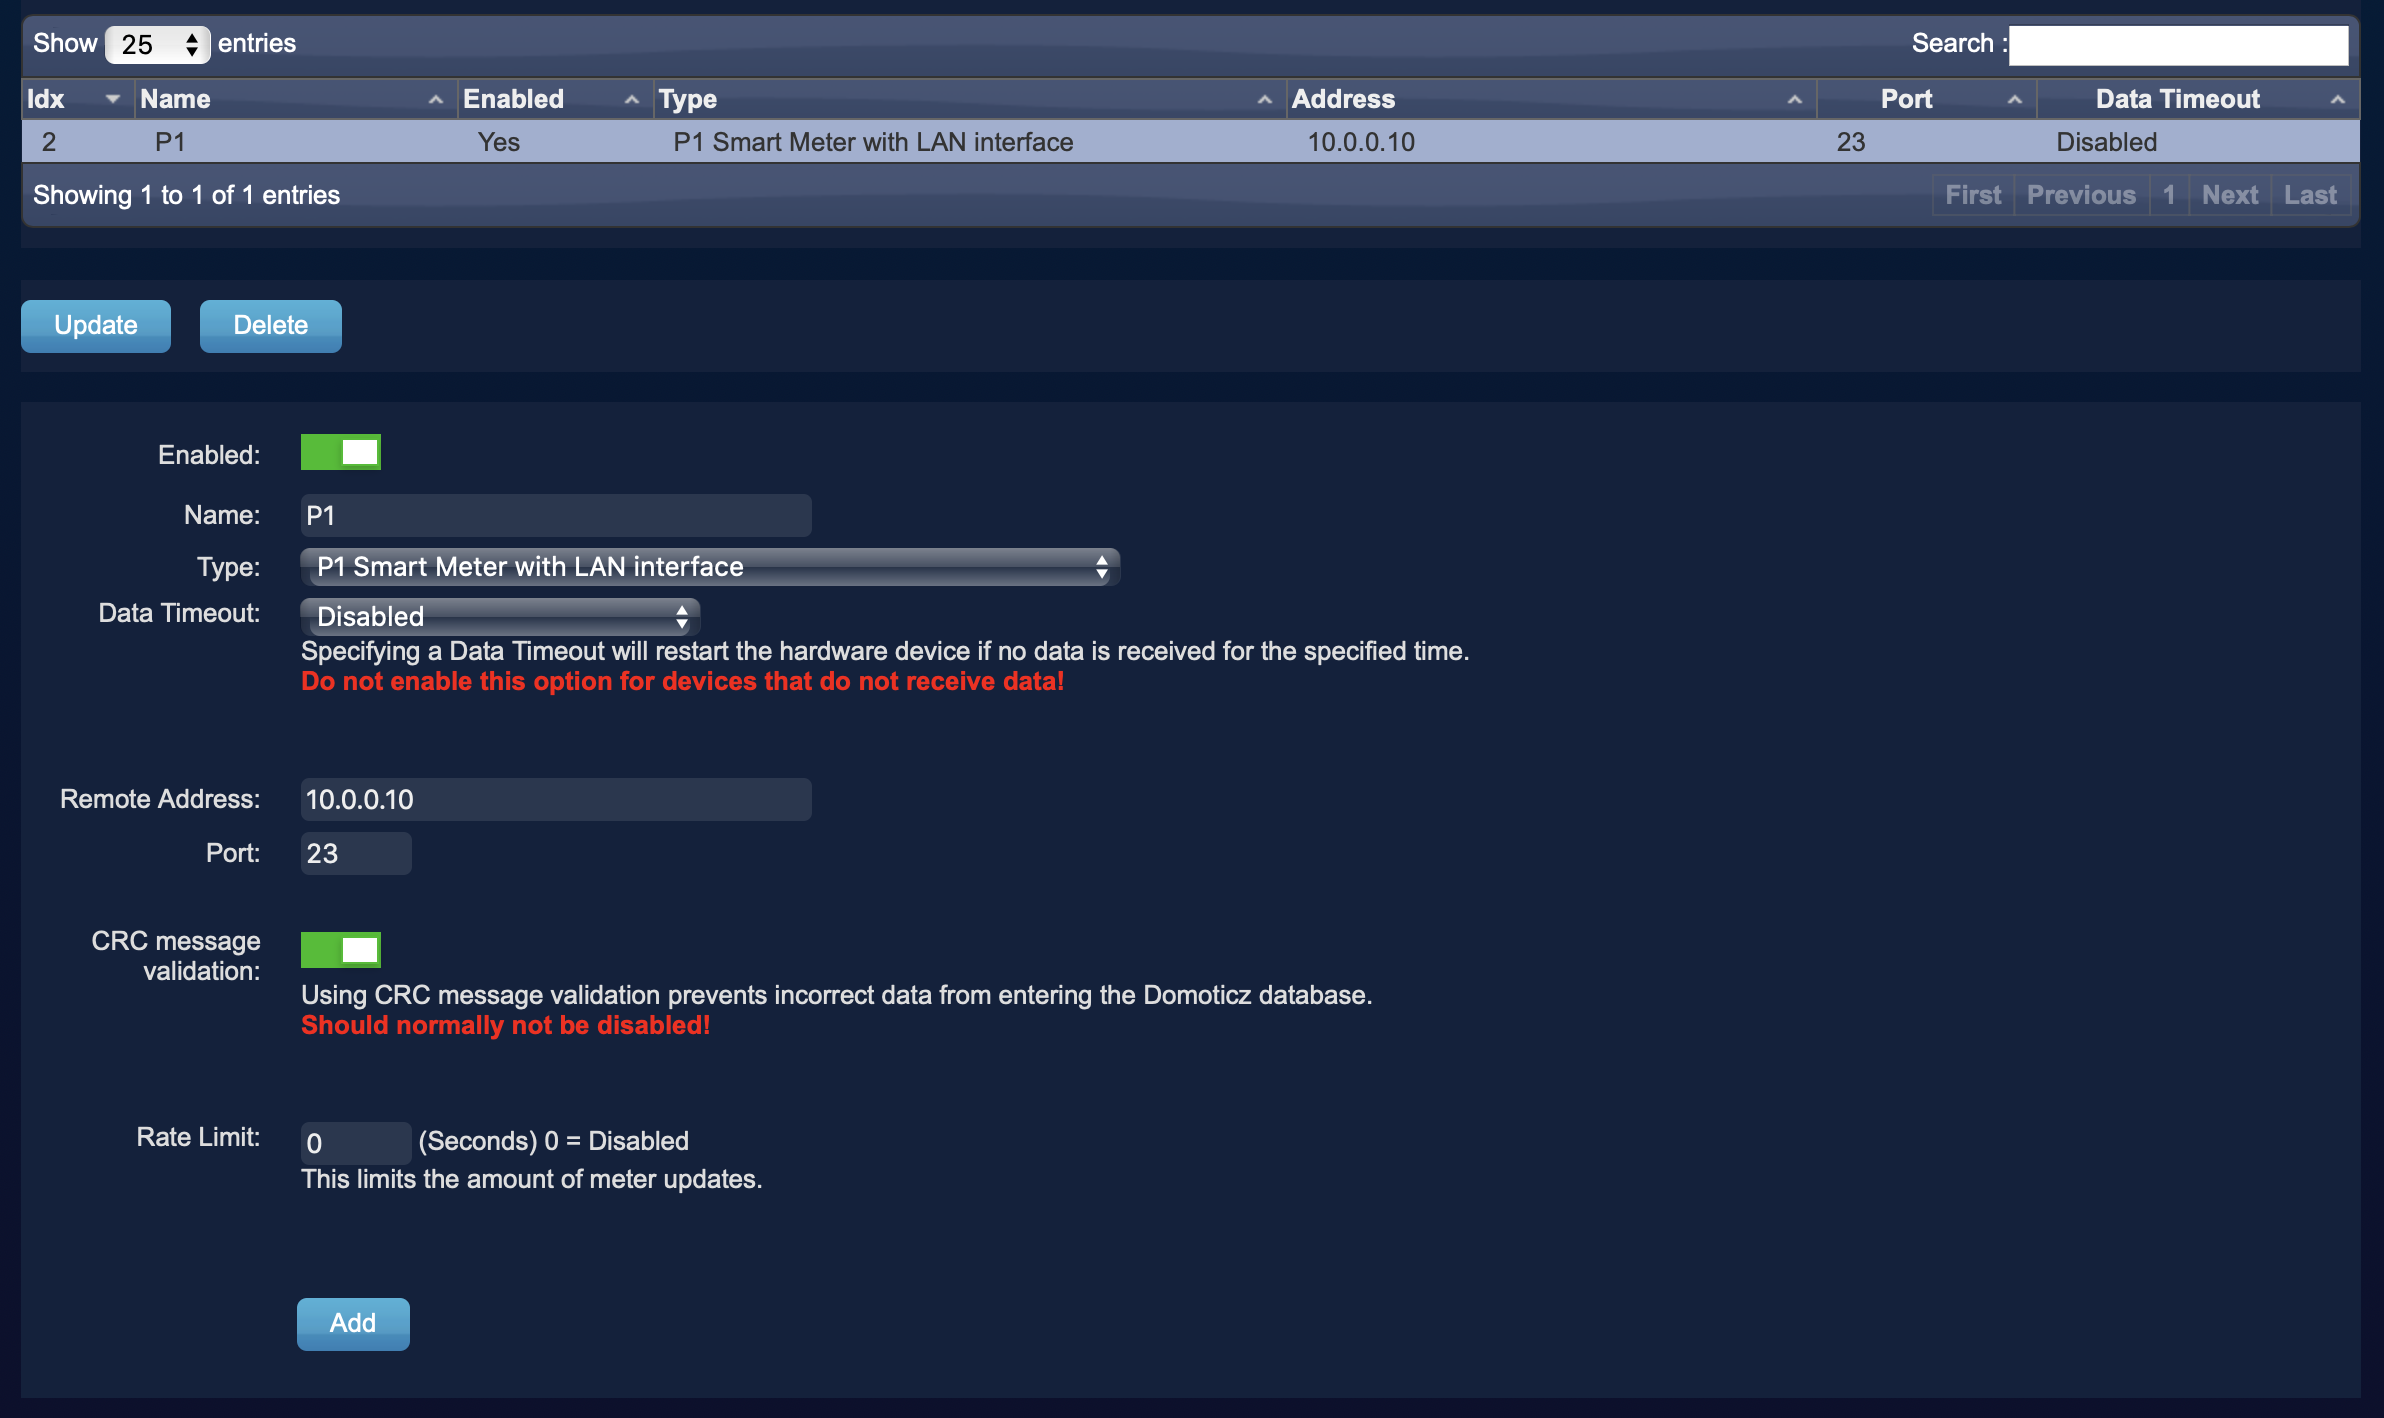
Connect to Domoticz
The setup for Domoticz is written here, under section “For connection via ethernet”. The port is 23. It should look like this: